Monday, 5 May 2014

Rye Sourdough English Muffins

Another recipe to make use of the "discarded" sourdough starter.

Ingredients
120g starter that has been stored in the fridge (mine is a 100% hydration rye starter)
200ml milk
344g all purpose/plain flour
1 TBSP sugar
3/4 tsp salt
1 tsp baking soda
Semolina or cornmeal, for dusting

Method
Mix starter, flour and milk in a large container. Mix to combine, cover with plastic wrap, and leave out for 8 hours or overnight.

Starter, flour and milk mixed and left overnight in room temperature

Result overnight. Bubbles are obvious and doubled in height


After the overnight rest, add sugar, salt and baking soda and mix well. Turn onto a lightly floured surface and knead for 4-5 minutes.

Roll out to 2 cm height and cut with a biscuit cutter into rounds. You can re-roll the scraps, but you may need to let the dough rest before cutting more muffins from them. Place muffins on a piece of parchment dusted with semolina and let rest for 45 minutes.

Cut into rounds and resting on semolina


Spray frying pan lightly with spray oil. Cook muffins for about 6-8 minutes on each side using low to medium heat, or until browned on the top and bottom and cooked through. Don't use too high heat or the top and bottom will be too brown and the middle remains uncooked.

In a frying pain, lightly coated with oil

Waiting to be eaten

Sunday, 4 May 2014

Sourdough Walnut Bread

Esther has been buying walnut bread for the past few weeks. And I have been trying to perfect a loaf of sourdough bread. So, instead of just baking a simple sourdough bread, I added walnuts to my loaf. The good thing about bread making is that the end product is edible even if the baking fails. :p

As usual, for the sourdough bread, we need to create a levain first which will be used to "lift" the final bread dough.

Levain
52g bread flour
20.5g water
22g active sourdough starter (100% hydration)

Active starter means after feeding, the starter will double or triple its size within 12 hours. It depends on the temperature you are keeping the starter in.

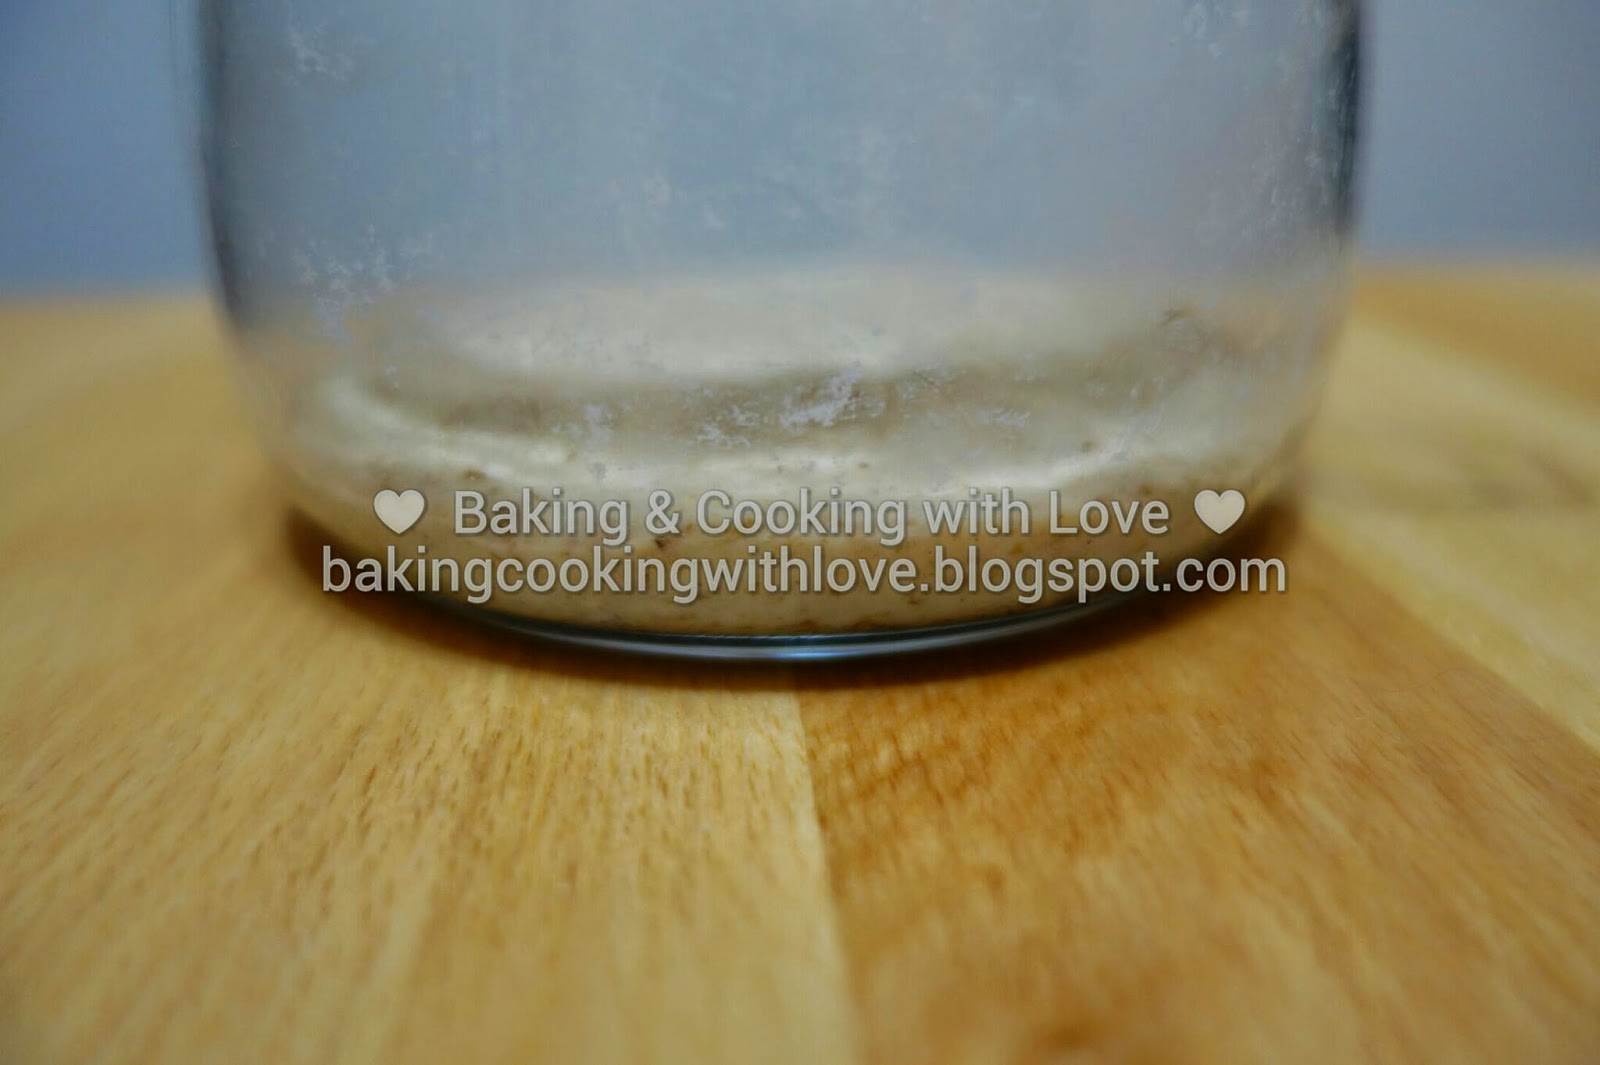
Start by dissolving the starter in water. Then add in the bread flour and mix until the flour is fully incorporated. I flattened it in a glass jar to monitor how much it rises overnight. Cover the opening of the jar with cling film.


Levain created

Notice the bubbles in the levain left overnight in room temperature


Final Dough
208g flour
23g whole wheat flour
165g water
5.5 salt
94.5g of levain created above
46g toasted walnut


Method
In a stand mixer, mix the flour and water at low speed until it forms a shaggy mass. Cover and autolyse for 60 minutes. During the wait, you can toast the walnut.

Shaggy mass of flour and water


Toast the walnut at 200C in a toaster for 10 minutes, stirring them regularly. Let them cool down before using.

Toasted walnuts, broken into smaller pieces


Add the salt and levain and mix at low speed for 2 minutes, then increase the speed to medium (Speed 2 in a KitchenAid) and mix for 10 minutes. Add flour and water as needed to adjust the hydration.

Add in the walnut and mix by hand. I tried using the stand mixer but it doesn't seem to be doing a good job at mixing the walnuts into the dough.

Transfer the dough into a oiled bowl and do a stretch and fold, then shaped into a ball to bulk ferment.

After the first stretch and fold


Do a stretch and fold every half hourly for 2 hours to develop the gluten during the bulk fermentation.

After the 2nd stretch and fold


Notice the dough getting tighter and less "relaxed". Compare the photo above and below.

After the 3rd stretch and fold


After the final stretch and fold, pre-shape the dough into a ball and rest for 15 minutes while you prepare the banneton. I floured the banneton with rice flour to prevent the dough from sticking during the proofing stage.

Dough resting


Shape the dough tighter into a boule and put it in a floured banneton. Let it proof. It is difficult to say how long you should proof for because it depends on the activity of your levain and also the surrounding temperature.

You can try using the "finger poke" test to see if the dough has proofed sufficiently. By poking at various places on the dough with your floured index finger to a depth of 1 cm, see how the dough behaves when you remove your finger. If the indentation disappears immediately, it is not proofed. If the indentation stays the same, it is over-proofed. What you are looking for is for the indentation to pop back half-way. This is the point where you can bake the bread. Don't worry about leaving dents on the dough. Once it is in the oven and expanding, the dents will disappear.

Dough proofing in a green plastic banneton


Bake the dough in a preheated oven at 240C for 30 to 40 mins. Use a thermometer to check the internal temperature. You are aiming for around 96C in the middle of the bread.

The final product

Crumb shot


Still trying to master my sourdough starter. Baking bread using sourdough is different from using commercial yeast. How fast the dough rises depends on the "mood" of the sourdough and nature of things.

Next bread might be baked using a kombucha starter instead of a rye sourdough. We shall see...

Saturday, 3 May 2014

Sourdough rye and whole wheat crackers

When you are growing your sourdough starter, you need to discard half of it and feed the leftover with more flour and water. So what to do with all the discarded sourdough starter when you are growing your sourdough? Do you throw it away? It's perfectly edible flour that has been fermented. I keep a big bottle of it in the fridge to stop it from fermenting further.


Found this recipe at The Fresh Loaf.

50g whole wheat flour
20ml coconut oil
0.9g salt
100g discarded sourdough starter at 100% hydration (50g flour/50g water)


Mix the whole wheat flour with salt, then mix in the coconut oil. Add in the sourdough starter and mix well. Leave it overnight until risen in a warm place. My house is around 30C all year round.

All ingredients mixed


Fermented overnight and risen. See the bubbles.


The next day, take out the dough and roll it out as thin as possible and evenly with a rolling pin. Then cut up the thin dough into squares using a pizza cutter. I use a "special" rolling pin to control the thickness I want. :)

Rolled as thinly and evenly as possible and cut.

Special rolling pin that can control the thickness of the dough


Bake it in the oven at temperature of 175C convection mode. Rotate your tray at around 7 to 8 minutes if your oven heat is not even. As mine is very thin, it is done in 14 minutes. So, monitor it closely to prevent the crackers from being burnt. Noticed the edges are darker than the middle.

The crackers will shrink once they are done

Keep in airtight container to maintain the freshness and crisp.

Thursday, 24 April 2014

Malted Sourdough Bread

I bought some malt extract from a health food store and it has been sitting in the fridge and I don't really use a lot of it, so I decided to look for a bread recipe that uses it.

Everyday Malted Brown Bread Recipe (from here)
700g brown or wholemeal bread flour
200g white bread flour
80g malt extract
80ml sunflower or vegetable oil
4 tsp dried active yeast
30g demerara or light brown sugar
3tsp maldon sea salt, crushed (if you use regular table salt you will need to add more - try 4tsp)
540ml water

I did a few changes to the original recipe. The above recipe uses yeast but I am more keen to use my rye sourdough starter. I also halved the recipe to make a smaller loaf. As I don't have brown or wholemeal bread flour, I used normal bread flour and whole wheat flour instead.

Malted Sourdough Bread Recipe
340g bread flour
100g whole wheat flour (to be used in the levain)
260ml water (divided 100ml + 160ml)
20g sourdough starter (100% hydration = 10g rye + 10ml water)
40g malt extract
40ml vegetable oil
15g light brown sugar
9g salt (Baker's percent: 2%)

Total flour = 450g (including the flour in the starter)
Total water = 270ml (including the water in the starter)
Hydration = 60% (270/450*100)

Levain
Add 100g whole wheat flour and 100ml water to 20g rye sourdough starter. Mix well and ferment for 12 to 16 hours.

My sourdough starter is normally in the fridge hibernating if I am not baking. A few days before using it, I will take it out of the fridge and feed it daily to wake it up and strengthen it. Sourdough starters are different from commercial yeast. Because it is natural, it tends to take a longer time for the bread to ferment and proof unlike using those hyperactive commercial yeast. There are some advantages of eating sourdough bread which you can spend some time reading if you are interested.

Levain created with sourdough starter


I left mine for 21 hours due to work commitments. As seen below, the levain is now very bubbly and has raised in height. If you give the sourdough a sniff, you can detect traces of fruity smell with some sourish tang as well.

Doubled in height and bubbly

Lots of bubbles


Main Dough
Using a mixing bowl, mix the levain with the rest of the water (160ml) to dissolve it. Add in all the other ingredients except the salt and mix well. Leave it covered to autolyse for 30 to 60 mins.

After that, add in the salt and mix well and knead the dough.

Shaggy mass after adding all the ingredients


You can knead the dough using a stand mixer or by hand until gluten is developed. Let it rest in a covered bowl for 2 hours to bulk ferment at room temperature.

Dough that has been knead and left to rest


After 2 hours, shape the dough into a boule and placed it in a oiled and floured bowl. I floured the bowl with semolina which is why it looked so grainy. You can use corn meal or rice flour as well to prevent sticking. Cover it with cling film and put it in the fridge overnight. That will allow slower fermentation and proofing which will result in nicer flavours in the bread.

Dough is shaped and placed seam-side up in a oiled and floured bowl

The next day, take it out and leave it at room temperature until the dough has proofed enough for baking. If your bread proofed overnight in the fridge and is ready to bake, you can bake it straight from the oven, there is no need to wait for the dough to come to room temperature. You can score the dough to help get a better/more even rise in the oven.

Preheat the oven to 210C, transfer the dough to a baking sheet/stone and bake for 30 mins. You can use steam for the initial 15 minutes.

The end result - Malted Sourdough Bread

I could have baked the bread at 230C instead of 210C, that might result in a better rise. Also, maybe increase the hydration of the dough to 65% instead of just 60%.

If I were to use this recipe again, I would replace the water with Guinness and make a Malted Sourdough Guinness Bread. :)

Friday, 4 April 2014

Whole Spelt Bread with Herbs-infused Olive Oil using Tang Zhong starter

This loaf of bread is made with whole spelt flour, using tang zhong starter. Tang zhong is a method from Asia which involves heating up a portion of the flour with water until 65C and turning that into a glue-like paste consistency. By doing so, the final product ends up softer and fluffier.

Ingredients
Tang zhong starter
20g whole spelt flour (around 5% of total spelt flour used)
100ml water

Main dough
360g whole spelt flour, divided (180g + 180g)
140ml water
40ml herbs-infused olive oil
40ml honey
120g tang zhong starter (see above)

Method
Start by making a tang zhong starter. The ratio of water to flour is 5:1. For my case, I used 100ml water with 20g spelt flour and mixed them in a pot while heating the mixture up to 65C, stirring continuously. Once the temperature is reached, turned off the heat and let the mixture cool down. You can cover it with clingfilm and put it in the fridge for a few days before using.

Tang zhong starter


Heat up 40ml of olive oil with some of your favourite herbs. Let it cool down and strain it before using.

Olive oil infused with herbs


In a stand mixer, combine 180g of the spelt flour with 1 tsp of yeast and 6g of salt. Add to the mixer, 140ml water, 40ml honey and the 40ml of herbs-infused olive oil. Mix it for one minute.


Cover the bowl with a towel and let it rest for one hour. It will be bubbly like below.

Bubbly bubbly bubbly


Add in the tang zhong starter. If you had placed it in the fridge, take it out for at least a few hours before using.

Start adding in the rest of the flour in small proportions while mixing. You will know you have added enough flour when the dough pulls away from the bowl and forms one big ball. The dough may be slightly sticky. Do not over-add the flour or the dough will be too dry. It is alright to have some flour left. For this bake, I have 20g of flour leftover. Do not over-mix this dough in a stand mixer because the gluten in the spelt flour is very fragile and over-mixing will destroy the gluten strands.

Placed the dough in the loaf tin and let it proof for 1 to 2 hours. When it doubles in size, it is ready for baking.

Proofing


Proofed and ready to be baked


Preheat the oven to 175C. Bake the bread for 25 to 30 minutes. Take the tin out of the oven and let it cool for about 10 minutes, then carefully remove the loaf and finish cooling on a rack.

Freshly out of the oven


Loaf is cooling down


Cross-section of the bread


Do try making this on your own and see how soft the bread can be. You can use normal bread flour instead of spelt flour. If you are using normal bread flour, you might want to knead the dough to develop the gluten.

Wednesday, 1 January 2014

Kek Lapis/Kueh Lapis Legit

This is a cake with a thousand names with a thousand layers. Ok, I'm just kidding. It does have a few names and close to 20 layers. The layers are added one by one. After the top layer is grilled, another layer of batter is added. It is very time-consuming and tedious because you can't leave the cake to bake by itself. The moment you leave it in the oven for too long, the top layer will be burnt. Each layer takes between 3 to 5 mins to be done. How fast it takes depends on individual oven. You need the grill function or top heat only.

Recipe
400g butter
6 tbsp condensed milk
1 tbsp rempah kueh powder
6 to 7 tbsp brandy/rum (optional)
30 egg yolks
4 egg whites
300g sugar
100g plain flour
7" by 10" tin

Ingredients for Kek Lapis


Cream butter in a mixer and add in condensed milk and mix. Add in rempah kueh powder and mix. Add in brandy or rum, depending on your preference.
Creamed butter with condensed milk and rempah kueh powder


Preparing the egg yolks.
Egg yolks!


In another mixer, beat egg yolks and whites with sugar until light and fluffy or double in volume.
Beating egg yolks/whites with sugar


Fold flour into the egg mixture.
Fold flour into egg mixture


Fold the egg mixture into the butter mixture.
Batter ready


Oil the bottom of the tin and place a piece of parchment paper at the bottom.
Weigh out 100g of batter for the first layer, place it into the tin and level it.
1st layer


Grill the layer until brown. Rotate the tin if your oven heat is not even.
Top layer grilled to brown


Take out the tin, press down the layer and poke with a toothpick if there are any bubbles.
Press down every layer


Place another 100g of batter into the top layer. Grill until brown.

For subsequent layers, use 80g of batter.

Repeat the above steps until you finish the batter or you go crazy, whichever comes first. Hehe. This cake is expensive because it is very labour intensive.

For the last two, use 100g of batter instead of 80g.

Once the lapis is done, separate the sides from the tin and invert it over a rack so that it has the characteristic criss-cross pattern on the top and let it cool down. You can removed the tin while it is cooling.


Separate the kek lapis from the edge of the tin


Cut the lapis up only when it has totally cooled down. The kek lapis will taste better after 2 to 3 days.

Monday, 30 December 2013

Macarons - Part 2 (The Ingredients and Perils of the Journey)

In the previous post, I blogged about what equipment is needed to make macarons, what is considered a "perfect" macaron. Here is where I tell you what are the things to look out for and the common problems that can cause a failed batch after a hard day's work.

I have to tell you in advance that this post is quite dry because it's all technical stuff.

Honestly, I am no expert on this. I have only started baking macarons in October this year. If you do a search on the Internet, you will find tons of information and recipes dated as early as 2008. So, whatever I know, I learnt it from those websites.

Now, even if you have the perfect recipe (like Pierre Hermé's), you might not be able to get the same taste and quality as what his shop is selling. Simply because there are just too many variables and factors to consider. Even the ambient temperature and humidity play important roles in making this finicky pastry.

There are only 3 ingredients needed to make a macaron shell. Ground almonds, sugar, egg white. Powdered sugar and granulated sugar are used in most recipes.

Some other ingredients are used to stabilise the meringue such as cream of tartar/pinch of salt/lemon juice and to colour the shells using gel/powdered food colourings. They are not absolutely necessary. The braver bakers would try to flavour the shells with cocoa, dried fruit powders etc. The reason why I say they are brave is because there is always a risk that the macarons can come out as a failure when things are added causing the fine-balance to be toppled. So, if it is your first try, do not add anything extra to the shells, not even colourings.

That's it. Sounds easy peasy. End of story...

Ya, right!

Lets proceed to the more technical/demanding/boring part.

The ground almonds and powdered sugar form what is called the tant pour tant. They are in equal amounts by weight. Please don't use cup measurements. Some recipes do not have equal weight of ground almonds and powdered sugar and they still worked. The almonds must be grounded fine enough, and must not be too wet because moisture creates havoc in the shells. Some recipes insist on pure icing sugar, like I mentioned in the previous post, I don't think that is necessary, in fact, I find the cornstarch useful in a humid country like mine.

Regarding the egg white, some recipes suggest to "age" it first before using. The range can be from one to two days up to one week of aging! Some say leave it outside the fridge and just cover the bowl with paper towel to let evaporation take place. Some say to put the egg white in the fridge for a few days. Pierre Hermé suggested in his book to leave the egg white in the fridge for 5 days and cover the bowl with cling film, but cut a slit on the film with a knife to allow evaporation. I tried aging the egg white occasionally for 1 to 2 days, but I do not see any difference in the result. Maybe because I am using an italian meringue and fresh egg white does not cause any problems. If you are using the french meringue method, try aging your egg white. The main thing is, before using the egg white, bring it to room temperature before whisking.

The egg white and the granulated sugar are used to make a meringue which is later mixed with the dry ingredients. The meringue can be made using the french method or the italian method. French meringue is easier to make but less stable, italian meringue is more troublesome to make, but more stable. Less stable means that you can over-mixed the batter easily when you mix in the dry ingredients resulting in a very fluid batter that you cannot even pipe.

A lot of variations can happen even for the french meringue, some recipes state to whisk the egg white to stiff peaks, some say to medium stiff peaks. Some say to add in sugar the moment you start whisking, some say to add in the sugar slowly after the egg white has turned frothy, some say you dump the whole load of sugar in at one go. Some include the usage of cream of tartar/pinch of salt/lemon juice at the frothy stage to stabilise the meringue.

For the italian meringue, it is even more complicated. Possible variations I have seen include the stage of the egg white (soft peak, firm peak, stiff peak) before adding the boiling sugar, the temperature of the boiling sugar before it is added into the egg white, to what stage is the meringue whisked until (firm peak, medium stiff peak, stiff peak) and what temperature the meringue is (until cooled, body temperature, 40C to 50C) before adding to the dry ingredients. For italian meringue, it is advisable that you use a candy thermometer to measure the temperature of the boiling sugar.

As for mixing the meringue with the dry ingredients, there are also many methods. Dump all the dry ingredients in at one go, add them in 3 separate portions, add the meringue to the dry ingredients all at once or add a portion of meringue to the dry ingredients and mix, then add the balance in.

When you are mixing the meringue and the dry ingredients, remember not to over-mix. It is always better to slightly under-mix than to over-mix the batter. Macaronage is the term used for the mixing. You don't have to be extra gentle when mixing because you are not making an angel food cake. In fact, you need to deflate the batter so that there is not too much air within the shells which might cause a volcanic eruption when they are baked. I am not joking here, the shells can split open and spew out their contents. When you see that happening, it means your hard work has gone down the drain.

At what stage should you stop mixing and get ready to pipe the shells? Some say macaronage should be done until the batter "flows like lava"... What is "flows like lava"?... I have never seen lava flowing in my life. In fact, I have not seen real-life lava before! So I went to Google for help and these are the pictures of flowing lava. Really! I don't think it helps at all.

Some bakers offer better guides. They suggest lifting some of the batter up with the spatula and watch how the batter drops back into the mixing bowl. If it drops down like a thick ribbon, it is most likely to be ready. The batter will also become smooth and shiny. Another confirmation is when the batter drops back into the bowl, look for an area where the "ribbon" has fallen, start counting to 30 seconds. If the "ribbon" fuses back with the main batter, the batter is ready. If the batter flows like water or fuses with the main body within seconds, you have most likely over-mixed. If the batter flows down in clumps and retains its shape after dropping into the bowl, you can continue to mix more.

Batter is too stiff, shells still retaining the peaks. Compare with the batch below.


You can pipe the shells on silicone baking sheets (silpats) or parchment paper. The feet that develop using silpats and parchment paper look different. After piping the shells, you have to rest the shells so that the exterior of the shells form a skin which is no longer sticky when you touch it. This will prevent the shells from bursting when they are in the oven and also helps lift up the shells during baking to form the "feet". (Imagine a hot-air balloon.) Some bakers claimed that there is no need to rest the shells, I believe that is because they are in a very dry environment and the skins form pretty fast while they are piping.

Shells waiting to dry. They will lose the shiny surface once they are dried.


Because of all these variations and permutations, even if you follow one recipe every time, the batch that comes out of the oven might be different from the previous batches or the next batch. So, the best advice I can offer you is to measure your ingredients precisely, grind your almonds as finely as you can possibly do, follow the steps accurately, watch your meringue closely as you whisk it, don't rush through the steps just so that you can throw the piped batter into the oven. The macarons will show you who is boss!

Talking about ovens, the baking temperature suggested in different recipes differs too. The range can be from 125C to 180C. Different ovens perform differently. Some say to use convection ovens to distribute the heat evenly, some say to turn off the fan. The baking temperature is based on your own oven and you may need to do many test batches to see what is the optimal temperature for your oven. 

When I first started, I piped a few shells and tested one temperature, then another batch of shells on a different temperature just to find the right temperature for my oven. If the shells turn brown before they are ready, turn down the heat. If the shells do not form the "feet", it might be because the temperature is too low. If the shells split open on the top, it might be because the temperature is too high or you did not wait for the skins to form.

Also, most ovens allow you to choose which level you want to bake, you have to try and see whether the lower third, the middle or the highest rack is most suitable. Some ovens allow you to bake two trays at the same time. It also depends on whether your oven has top heat, bottom heat or back heat. For those with only top heat, you might need a baking stone at the bottom. If your macarons brown too fast, put the tray in the lower rack. If the shells burst, put it in higher rack if there is strong bottom heat from your oven. You might even have to shield your macarons with foil to prevent them from browning because macarons should not turn brown after baking.

As you can see, it is not that simple.

In summary, the followings are areas that might cause you to have a failed batch of macarons.

  1. Almond - not finely grounded, too wet
  2. Meringue - not whisked enough or over whisked
  3. Batter - over-mixed or under-mixed
  4. Shells - not rested enough to form a skin over the exterior
  5. Oven temperature - too high or too low

So, watch out for the above and your macarons should be fine. *fingers crossed*

My next post on macarons will be about how I do mine and what recipe I use.

Sunday, 29 December 2013

Tiramisu in a cup

My husband loves tiramisu and every time he goes to a restaurant, he never fails to order the tiramisu for dessert. So one day, we decided to try making our own at home. Little did we know that it is such a simple dessert to make!

We adapted the recipe from here. This version of tiramisu has the eggs cooked which is safer for consumption. The original recipe calls for a loaf pan to assemble the tiramisu. We used that initially but find that using small cups is easier and more convenient (one cup for myself, two cups for my husband, heehee). You just have to break up the ladyfingers into smaller pieces to fit into the cups.

We altered some of the amount of the liquids, mascarpone cheese and sugar because we want the tiramisu to be creamier and also less sweet. You can do your own modification.

Cream Filling:
150 ml milk, divided 100ml, 50ml
100 grams granulated white sugar, divided 50g, 50g
35 grams all purpose flour
6 large egg yolks
60 ml Kahlua
2 teaspoons pure vanilla extract
57 grams unsalted butter, cut into small pieces
500 grams mascarpone cheese

Ladyfingers

Coffee Soaking Syrup:
100 ml very strong brewed coffee or espresso (4 tbsp)
60 ml Kahlua

Topping:
cocoa powder for garnishing
bittersweet chocolate, grated or chopped


Method:
2 day before you need the dessert, put 100 ml milk and 50 grams sugar in a saucepan. Place over medium heat, and bring this mixture just to boiling, stirring occasionally.

Meanwhile, in a heatproof bowl, whisk together the remaining milk, sugar, flour, and egg yolks.

When the milk comes to a boil, gradually whisk it into the egg yolk mixture. You must continue to whisk as you pour to prevent the egg yolks from curdling.

Transfer this mixture back into the saucepan and cook over medium heat, stirring constantly, until it comes to a boil. When it boils, continue to stir until it thickens.

Remove from heat and strain into a large bowl. This will remove any lumps that may have formed.

Whisk in the Kahlua, vanilla extract, and butter.

Cover the surface of the custard with plastic wrap to prevent a crust from forming. Leave it in the fridge overnight to cool.

The next day or once the custard has cooled sufficiently, remove from the refrigerator.

In a mixer with paddle attachment, beat the mascarpone cheese at low speed until it is soft and smooth. Gently beat the cold custard into the mascarpone until smooth.

Custard done, ready to incorporate with the mascarpone cheese


In a large bowl combine the coffee (espresso) and Kahlua.

Place a layer of cream filling at the bottom of the cup. We use a large ice-cream scoop to make sure that the amount in each cup is about the same.

Break the ladyfingers into 3 or 4 parts. Soak each part individually for a few seconds and place it gently onto the layer of cream filling. Do not soak in the coffee syrup for too long or the ladyfinger will disintegrate in your hands.

Ensure that the ladyfingers are in a flat layer. If after soaking the ladyfingers for all the cups and you still have some coffee syrup left, you can brush the leftover syrup on the ladyfingers directly. Again, do not overload the ladyfingers with the coffee syrup or you will get a soggy mess.

One layer of cream filling with a layer of ladyfingers


To have the cup look nicer when you see it from the side, sift a layer of cocoa powder onto the ladyfingers. This is form a dark line in the middle of the cream fillings.

A layer of cocoa powder after the ladyfingers


Put another scoop of cream filling onto the ladyfingers. If you have a taller cup, you can put another layer of ladyfingers and topped it with another layer of cream filling. This is the final scoop for my case. After that, gently shake the cups to even out the top layer.

Final layer of cream filling


You can keep this in the fridge until you need it. We leave it in the fridge for one more night to let the coffee syrup in the ladyfingers and the cream fillings mixed together for better flavour.

Before serving, sift another layer of cocoa powder and grate some bittersweet chocolate on the surface. Do not do it too early or the cocoa powder will absorb the moisture from the cream filling and it will look dark and clumpy.